How to Change Your Gmail Name
4 min read

Table of contents
If you’ve been using the same Gmail account for a while, the name that shows up to users may no longer be accurate. For example, you may have gotten married and need to change your last name, or you may have a new name that you’re going by.
Whatever the reason, changing your Gmail display name is super simple once you know the steps. In this post, we’ll show you how you can do just that.
How to change your name on a Gmail account
Step 1: Open Gmail on your browser
It’s important to note that you can only change your Gmail name by accessing Gmail through your desktop, meaning you cannot change it through the Android or iPhone app.
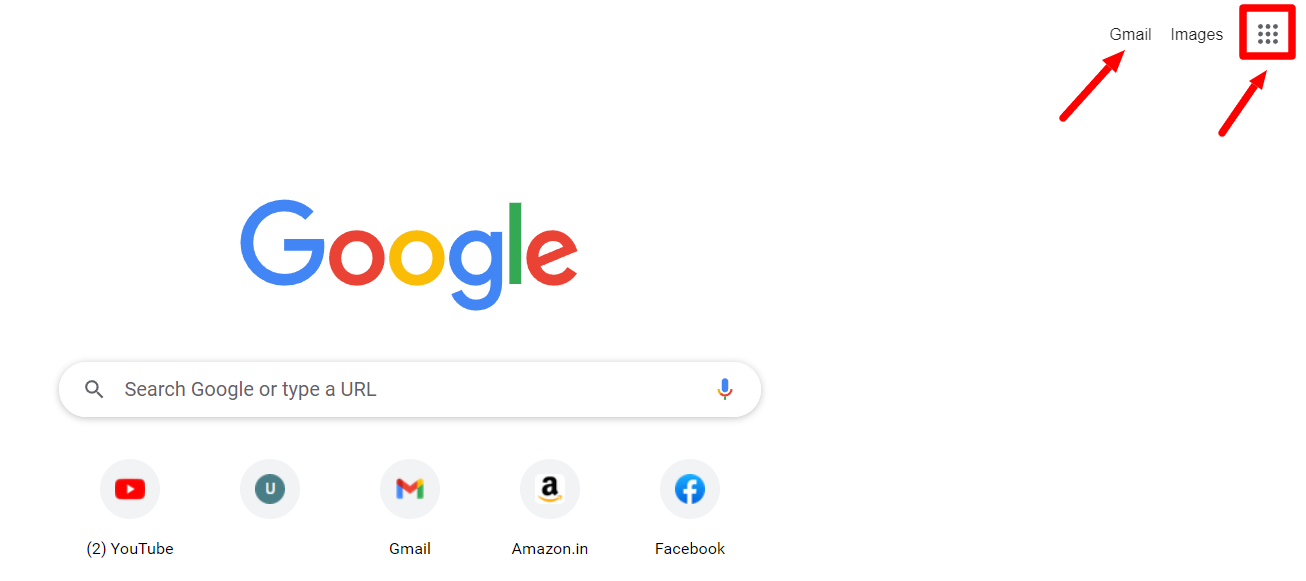
Go ahead and open Gmail on your browser. If Google Chrome is your default browser, you can just click the Gmail button in the top-right corner or click through the Google Apps button to find it.
Step 2: Open Settings
When in your Gmail inbox, click the gear icon to open quick settings. Then click “See all settings” to open more settings.

Step 3: Go to “Accounts and Import” tab
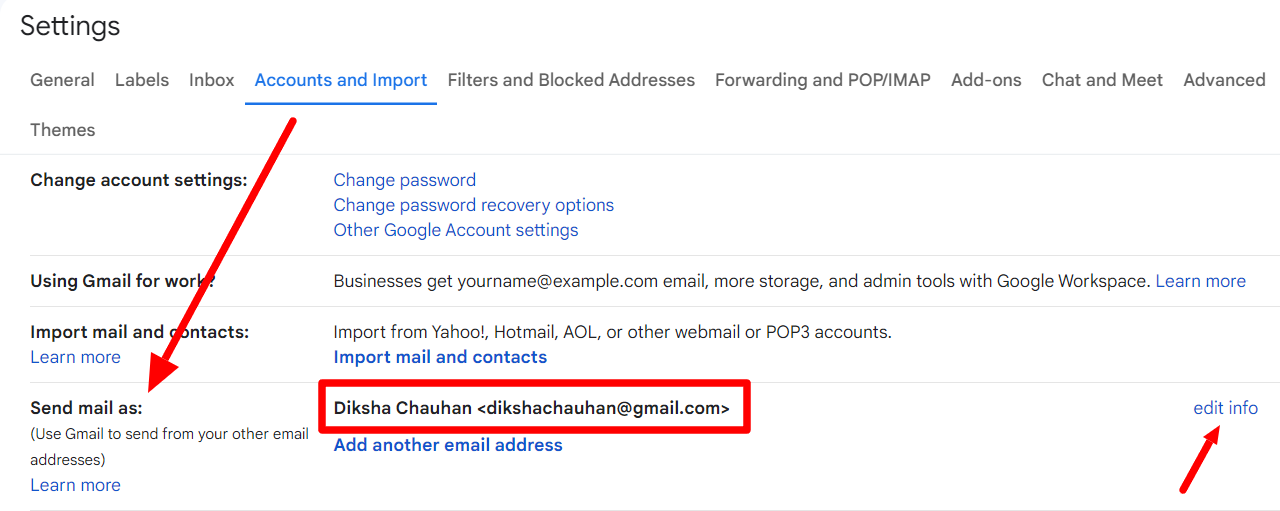
Once you are in Settings, toggle to the “Accounts and Import” tab.

Step 4: Click “Edit info” under “Send mail as” setting
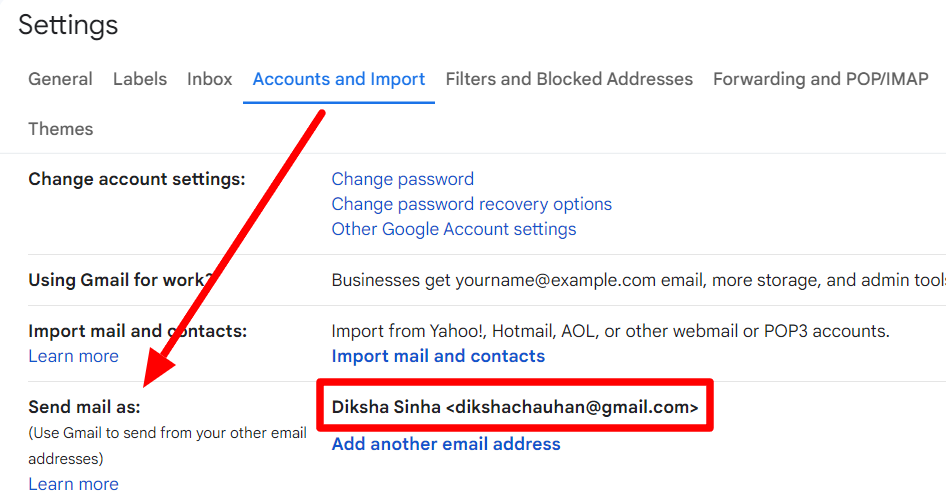
Under the Accounts and Import tab, look under the “Send mail as” setting. Here, you will be able to view your current Gmail name. After your Gmail name, you will see the associated email address within brackets. To change your Gmail name, click the “Edit info” button on the far right.
Step 5: Change your display name
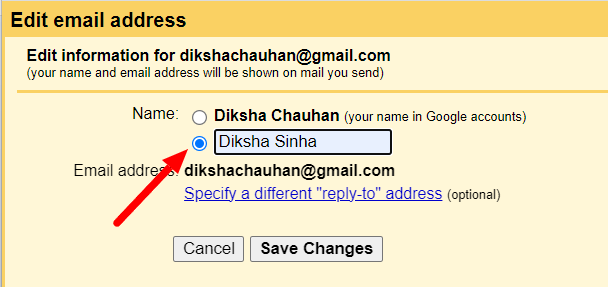
Clicking this option opens an “Edit email address” window. Your current Gmail name is displayed first. Select the empty field under it and fill in your desired Gmail name.
Step 6: Save changes
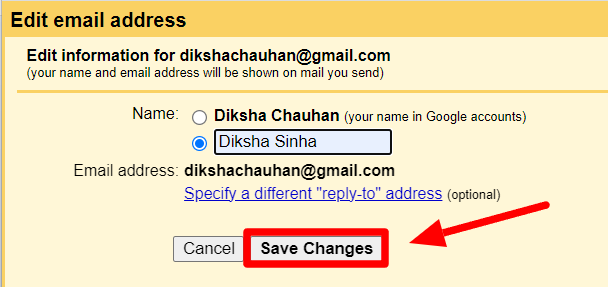
Once you’ve filled in your new Gmail name, click “Save Changes,” and you’re done!
Let’s make sure it went through by going back to the Accounts and Import tab and checking the “Send mail as” setting.
Important notes when it comes to changing your Gmail name
Now that you know how easy it is to change your Gmail name, here are some additional things to keep in mind.
Things to consider when changing your Gmail name
While making the required changes in the Gmail settings only takes a few seconds, the actual switch can take up to 24-48 hours to take effect. This doesn’t always happen, but it’s still worth considering. Further, there’s no limit to how many times you can change your Gmail name.
A little friendly reminder: make sure your new display name matches with the signature at the bottom of your email.
The only thing to remember is that even after the name changes, your username stays the same. But what’s the difference between the two?
Difference between your Gmail name and username
The Gmail name (a.k.a. sender’s name or display name) is displayed when someone receives an email sent by you. This can be changed as many times as you like. The username is the information in your email address before the domain.
Your username is associated with your Google account and, once chosen, can’t be changed. If you want to change your email address, the only way is to create a new one and transfer your data.
You can always send from an alias
If you don’t want to change your Gmail name but don’t want it to appear in an email, there’s another option: you can send it from an alias.
An alias Gmail is another email address that you own. If you don’t want the added hassle of transferring data to a new email address, you can make that your default address that you send emails from.
The process is relatively easy. Just remember that you must verify the email address you want to add as the alias. If you’re using the alias email to send professional emails, it’s important to know that it may affect deliverability (i.e. inbox placement). Learn in detail how to send emails from an alias email address.
Learn everything you can do on Gmail on the YAMM blog
So there you have it! Now you know how easy it is to change your Gmail name. Just go to Settings and look under the Accounts and Import tab. Find the “Send mail as” setting and input your new Gmail name. Gmail is great for sending professional and personal emails. You can get a lot out of it if you learn its various features. Want to learn everything that you can do with Gmail? Check out the YAMM blog!