
How to Pre-populate a Google Form from a Spreadsheet
Updated 8 min read

Table of contents
It isn’t easy getting people to fill up your forms. Many find it to be a chore that needs to be avoided as much as possible. However, what if you could make it easier for your respondents to fill up your Google Forms?
If you already have some information about your respondents and can get your Google Form to pull data from a spreadsheet or Google Sheet, your respondents would have to spend less time on your forms and you’ll get all the data you need from them.
All this is possible if you know how to create a prefilled Google Forms from Google Sheets. To do this, we need to learn how to link a Google Form to a spreadsheet and use the SUBSTITUTE formula.
Why pre-populate a Google Form from a Google Spreadsheet?
If there is one thing that people hate, it’s filling forms with the same information over and over again. A prefilled Google Form makes the life of your respondents easier. Essentially, it is a form you send to people with certain fields being pre-populated from data in a Google Sheet.
You probably already have information such as their name, roll number, and other data. You can use this data to autofill a Google Form before sending it to your respondents.
What is the SUBSTITUTE formula?
The SUBSTITUTE formula is used to replace existing text with new text in a cell. In this scenario, the SUBSTITUTE formula will allow us to pre-populate the Google Form from a Google Spreadsheet.

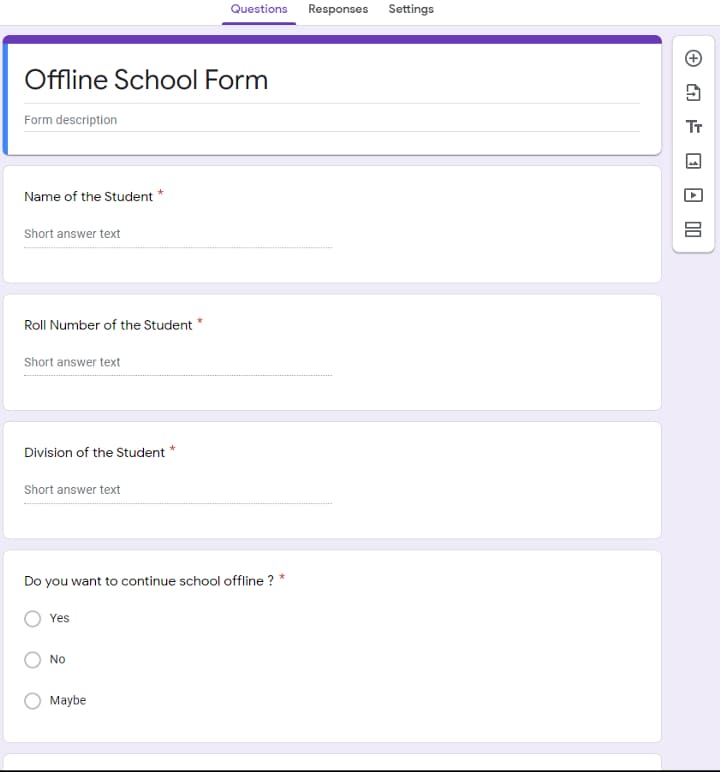
Step 1: Sample Google Form
The prefilled Google Form that we will be sending out is a form that will ask the students whether they want to use the offline mode of study. Using the formula we can fill in the student details such as name, roll number, and more so that the students can focus on the important questions in the Google Form. The form contains the following details:
- Name of the student
- Roll number of the student
- Division of the student
- Do you want to continue school offline?
- Any suggestions?
Step 2: Sample Google Sheet
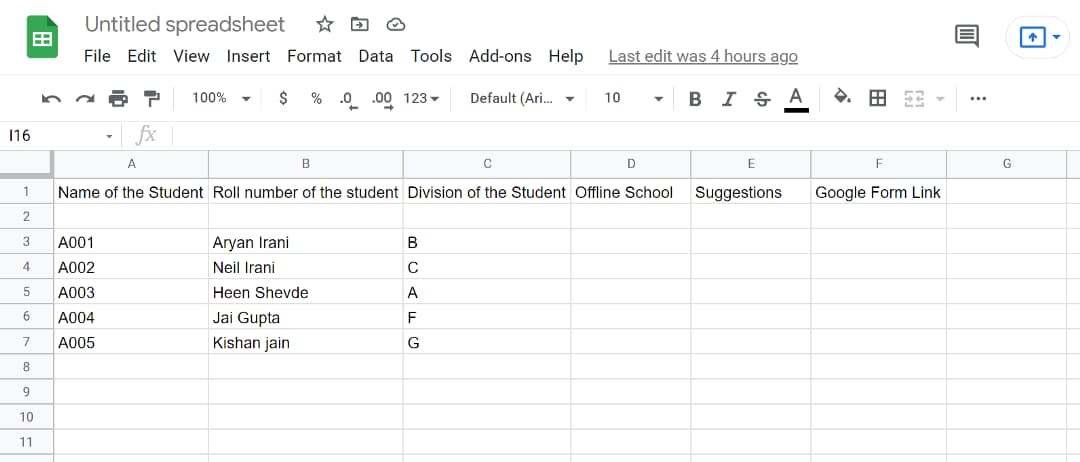
The Google Sheet contains the details of the students that we will be used to pre-fill the Google Form:
- Name of the student
- Roll Number of the student
- Division of the Student
- Offline school question
- Suggestions for the school if any
Step 3: Create a prefilled Google Form from Google Sheets
To create mass-prefilled Google Forms, we need to create a template Google Form link with the required fields for information. To do that follow these steps:
-
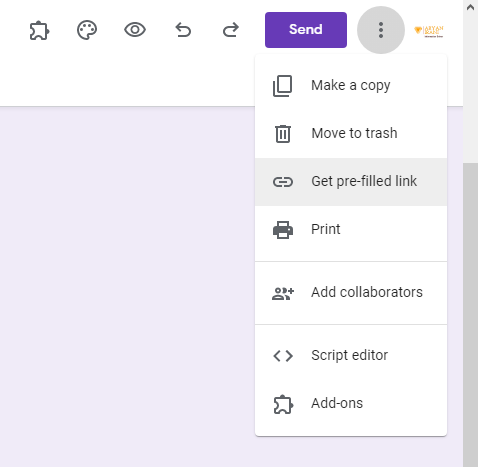
Click on the three dots at the top right of the Google Form and click on Get pre-filled link.
-
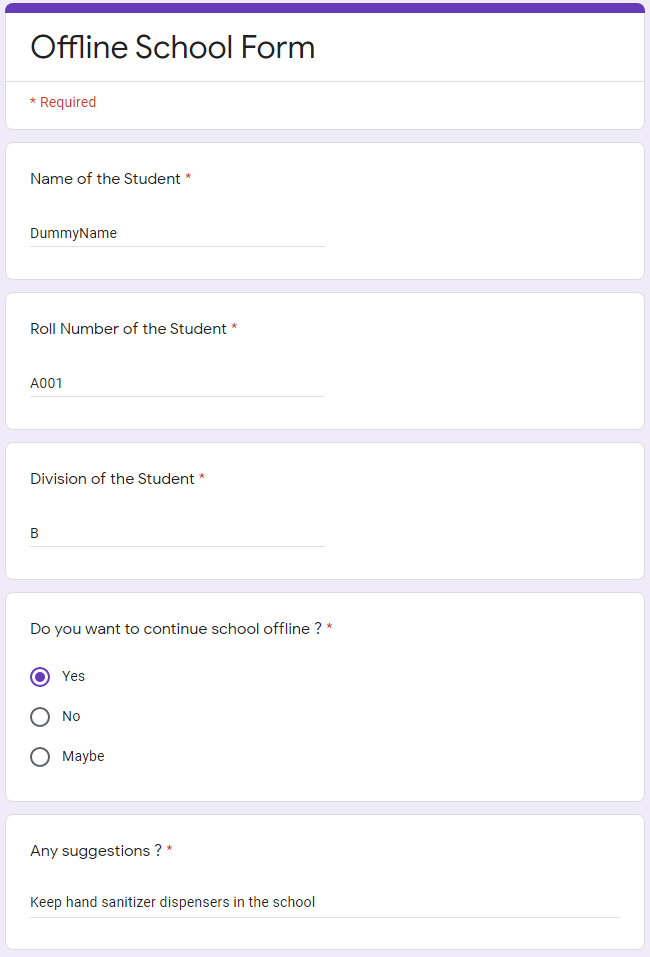
When you get a Google Forms prefilled link, you'll be taken to a new form where you should input dummy data.
-
After entering dummy data you will see a button that says Get Link. This link is the pre-filled Google Form link in which we will be substituting the new values using the formula. The google form link will get copied to your clipboard.
Step 4: Link the Google Form Template to Google Sheets
Now that we have got the template it's time to learn how to link your Google Form to a spreadsheet so that the fields get populated automatically. We will use the template to create bulk pre-filled google forms using the SUBSTITUTE formula. To do that follow these steps:
-
Create a new Sheet and paste the link in the A1 cell.

-
Switch back to the previous Sheet that has the student details that need to be pre-filled.
-
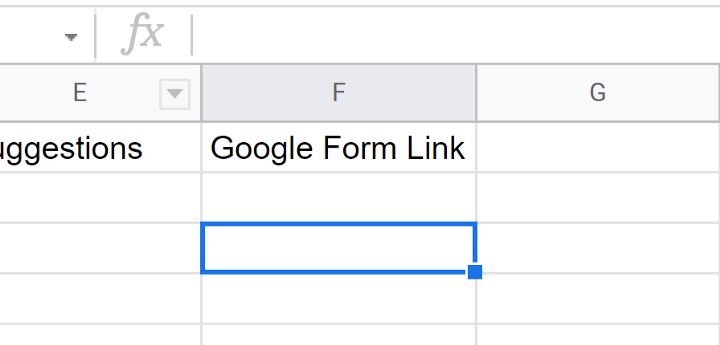
Next select the cell under the Google Form Link column.
-
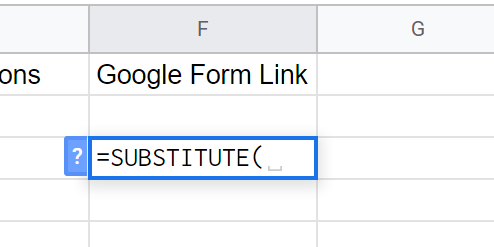
Start the formula by typing SUBSTITUTE (
-
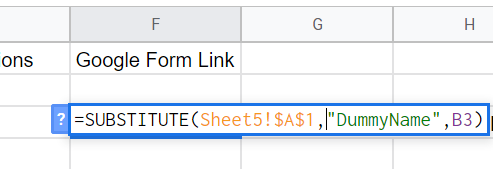
Here we will pass the following parameters in the SUBSTITUTE Formula:
- Sheet5!$A$1: Here I have passed the name of the sheet followed by the range where the Google Form link is stored using absolute cell referencing.
- DummyName: Here I have passed the DummyName parameter that we created. This formula is going to search in the range specified above for the text specified and replace it with the next parameter.
- B3: Here I have specified the column that we want to replace the search for data with. For this question, we have replaced the student’s name with the dummy name in the Google Form link, so I am going to specify the B3, which contains the name of the first student.
-
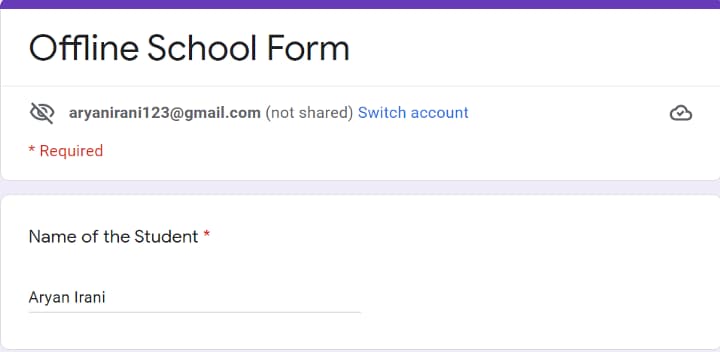
After you close the formula and open the Google Form, you will see that the name question in the Google Form contains the data present in B3.
We are going to do the same for all the questions present in the Google Form. To do that we are going to add as many substitute formulas as there are columns of information to pre-fill
The final SUBSTITUTE formula will look as follows :
=SUBSTITUTE (SUBSTITUTE (SUBSTITUTE (SUBSTITUTE (SUBSTITUTE (
Sheet5!$A$1,"DummyName",B3),
"A001",A3),
"B",C3),
"Yes", D3),
"Keep+hand+sanitizer+dispensers+in+the+school",E3)
Here we have started by mentioning the name of the Google Sheet followed by the cell where the Google Form Link is stored. Then for all the times, we need to SUBSTITUTE we have mentioned the value in the Google Form followed by the cell with which has to be replaced.
Step 5: Check the Google Forms autofill output
After saving the formula, the prefilled Google Form will look something like this.
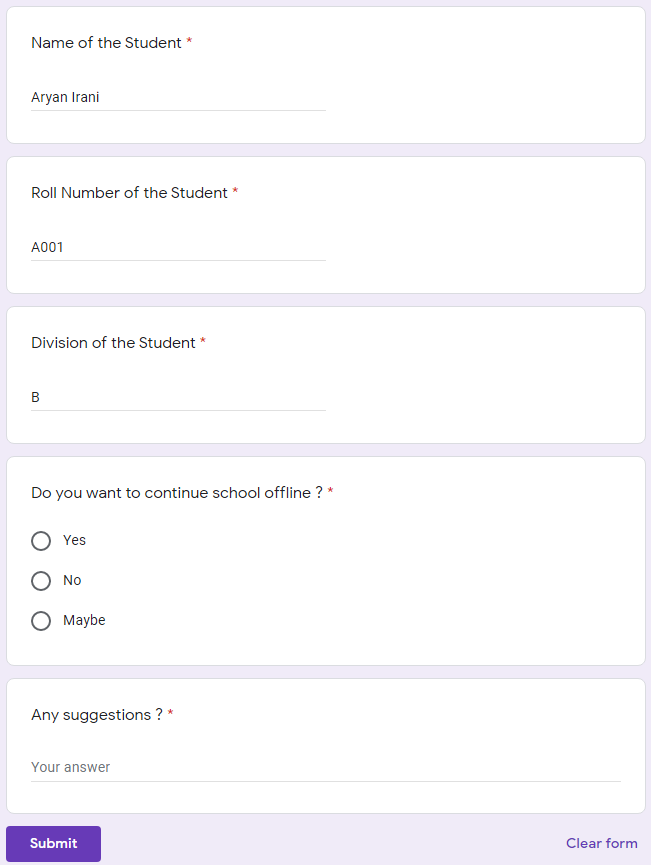
Here you can see all the data from the Sheet are pre-filled, and only new questions remain empty.
Step 6: Send out the prefilled Google Forms using YAMM
Now that the prefilled Google Forms are ready for all the students, it's time to send them over to the students. Doing this manually will be a very hectic task, we can automate this process by using Google Apps Script or the YAMM add-on.
Before we get into creating the draft for the email, we have to install the YAMM add-on to our Google Sheet. I have covered these steps in my previous blogs, read how to send bulk emails using YAMM to know more.
Step 7: Create your Email Draft
To create the draft, you have to follow the same steps that you follow to write an email. To create your draft, follow these steps:
-
Go to gmail.com
-
Click on Compose and start writing your email draft.
-
We have to replace the variables in the draft with the data in the Google Sheet. To do that you need to specify the column names that you want to replace in the draft like this.
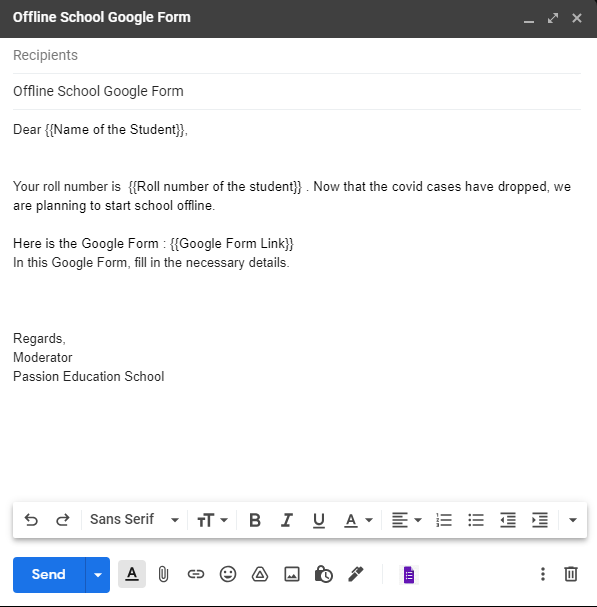
Copy the contents of the email:
Dear {{Name of the Student}}, Your roll number is {{Roll number of the student}} . Now that the covid cases have dropped, we are planning to start school offline. Here is the Google Form : {{Google Form Link}} In this Google Form, fill in the necessary details. Regards, Moderator Passion Education School -
Here I have done the following:
- Here I wanted to put the name of the student at the beginning of the email, so I put in the column name where the names are stored.
- The same is for all the other variables that I have called in the email draft.
-
After you are done creating the draft, save and close the draft.
Step 8: Send the Emails
Now that we have installed the YAMM Add-on, created the email draft, it's time to send out the emails. To send out the emails, follow these steps:
-
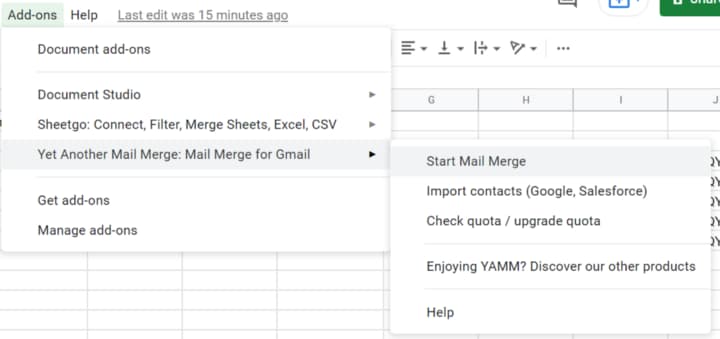
Go to Add-ons and click on Yet Another Mail Merge and start the mail merge.
-
On clicking Start Mail Merge, it will bring up a box where you need to put in some details.
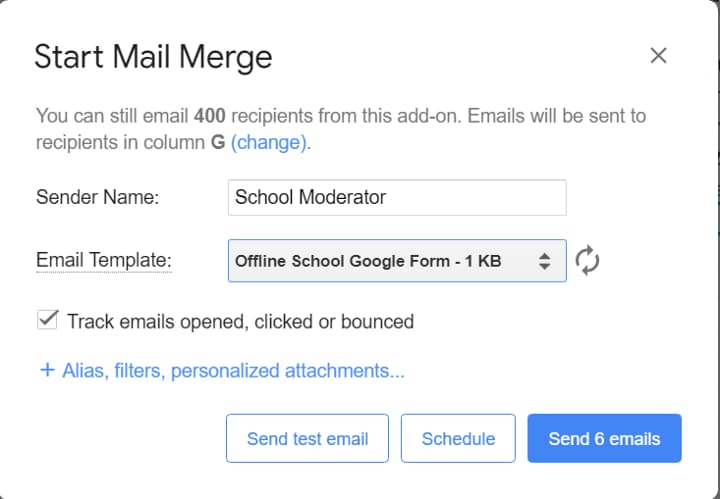
Here you need to specify the sender name, followed by the email template that you want to use.
Now that we have added all the features that we need, let's send out the emails. You can do the following:
- Send all the emails
- Schedule the emails
- Send a test email to check whether everything works fine.
For now, we are going to go ahead and send the emails by clicking on Send 10 Emails.
Step 9: Check the Emails
Here you can see on successful execution the email has been sent successfully and all the details have come in properly.
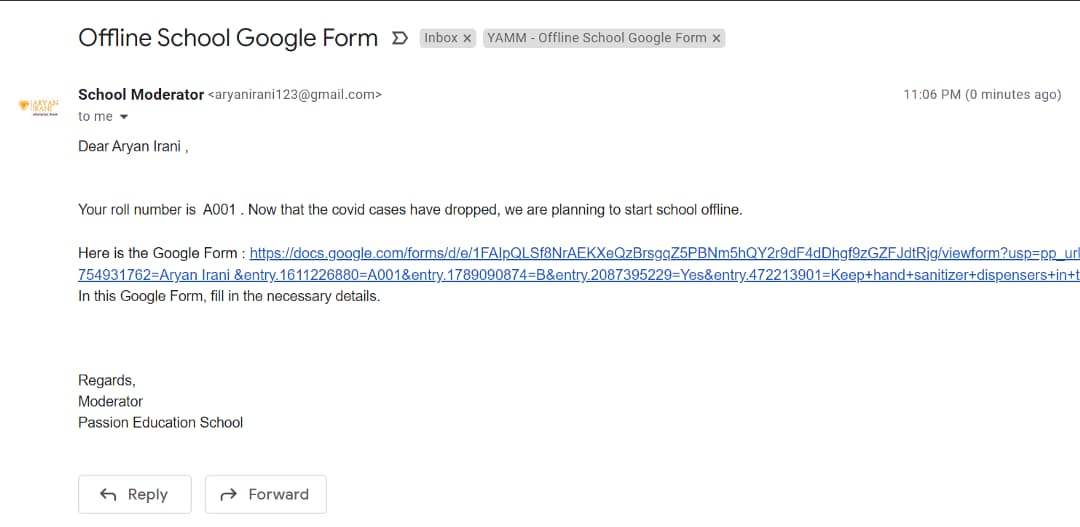
Here you can see all the details that we had specified have successfully come into the email.
In this blog, we covered how to create pre-filled Google Forms using the SUBSTITUTE Google Sheet formula. After creating the pre-filled Google Forms, we sent the forms to the students on their email addresses using YAMM. You can send your feedback to aryanirani123@gmail.com